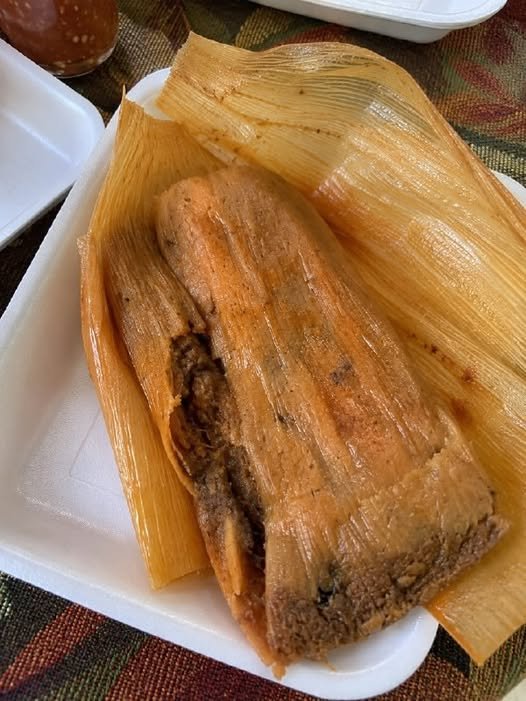
Grandmother’s Tamales are a treasured family recipe passed down through generations. Made with soft, fluffy masa dough wrapped around a rich, slow-cooked filling and steamed in corn husks, these authentic tamales are a labor of love often prepared for holidays, family gatherings, and special occasions. While they take time to make, the results are incredibly rewarding.
Recipe Overview
- Prep Time: 1 hour 30 minutes
- Cook Time: 2 hours 30 minutes
- Assembly Time: 1 hour
- Total Time: About 5 hours
- Yield: 30–36 tamales
- Difficulty: Intermediate
Equipment
- Large stockpot or tamale steamer
- Mixing bowls
- Electric mixer (recommended)
- Large skillet or Dutch oven
- Measuring cups and spoons
- Tongs
- Kitchen towel
- Spatula
Ingredients
For the Corn Husks
- 35–40 dried corn husks
- Warm water for soaking
For the Pork Filling
- 3 pounds pork shoulder (Boston butt), cut into large chunks
- 1 medium onion, quartered
- 6 garlic cloves
- 2 teaspoons salt
- 1 teaspoon black pepper
- 2 bay leaves
- 8 cups water
Red Chile Sauce
- 8 dried guajillo chiles
- 4 dried ancho chiles
- 2 dried pasilla chiles (optional)
- 3 garlic cloves
- 1 teaspoon ground cumin
- 1 teaspoon dried oregano
- ½ teaspoon smoked paprika
- 1 teaspoon salt
- 2 cups pork broth (reserved)
For the Masa Dough
- 6 cups masa harina
- 2 teaspoons baking powder
- 2 teaspoons salt
- 2 cups lard (traditional) or vegetable shortening
- 4½–5 cups warm pork broth
Ingredient Notes
Masa Harina
Use masa harina made specifically for tamales, not regular cornmeal.
Lard
Lard creates the lightest, fluffiest tamales. Vegetable shortening works if preferred.
Pork Shoulder
This cut becomes tender and flavorful after slow cooking and shreds easily.
Dried Chiles
A blend of guajillo and ancho chiles creates a deep, mildly spicy, smoky flavor.
Step 1: Soak the Corn Husks
Place the dried corn husks in a large bowl and cover completely with warm water.
Use a plate to keep them submerged.
Soak for at least 1 hour, until soft and flexible.
Drain and pat dry before using.
Step 2: Cook the Pork
In a large pot combine:
- Pork
- Onion
- Garlic
- Bay leaves
- Salt
- Pepper
- Water
Bring to a boil.
Reduce heat and simmer for 2–2½ hours, until the pork is very tender.
Remove the meat and let it cool slightly.
Reserve about 5 cups of the cooking broth.
Shred the pork using two forks.
Step 3: Make the Chile Sauce
Remove stems and seeds from the dried chiles.
Toast them lightly in a dry skillet for about 20–30 seconds per side—do not burn them.
Place the toasted chiles in hot water for 20 minutes until softened.
Transfer to a blender with:
- Garlic
- Cumin
- Oregano
- Smoked paprika
- Salt
- 2 cups reserved pork broth
Blend until completely smooth.
Pour the sauce through a fine-mesh strainer into a saucepan.
Simmer for 10–15 minutes to deepen the flavor.
Step 4: Prepare the Filling
Combine the shredded pork with most of the chile sauce.
Reserve about ½ cup of the sauce to flavor the masa if desired.
Cook the pork mixture over medium heat for 10 minutes, stirring occasionally.
Allow it to cool while preparing the masa.
Step 5: Make the Masa Dough
In a large bowl, combine:
- Masa harina
- Baking powder
- Salt
In another bowl, beat the lard with an electric mixer for about 5 minutes, until very light and fluffy.
Gradually add the dry ingredients.
Slowly pour in the warm pork broth while mixing.
Continue beating for several minutes until the dough is smooth, soft, and spreadable. It should resemble thick peanut butter.
Traditional Float Test
Drop a small spoonful of masa into a glass of cold water.
- If it floats, it’s ready.
- If it sinks, continue beating for a few more minutes.
Step 6: Assemble the Tamales
Lay a softened corn husk smooth side up.
Spread about ¼ cup of masa over the center, leaving about 1 inch clear at the top and sides.
Place 2–3 tablespoons of pork filling down the center.
Fold one side of the husk over the filling, then fold the other side over.
Fold the narrow bottom end upward, leaving the top open.
Repeat until all tamales are assembled.
Step 7: Steam the Tamales
Fill the bottom of a tamale steamer with water, making sure it does not touch the steaming rack.
Stand the tamales upright with the open ends facing up.
Cover with extra corn husks or a clean kitchen towel.
Place the lid on tightly.
Steam over medium heat for 90 minutes to 2 hours, checking the water level occasionally and adding more hot water if needed.
How to Tell When They’re Done
A tamale is fully cooked when:
- The masa pulls away easily from the corn husk.
- The dough is firm and no longer sticky.
- The texture is light and fluffy.
If the masa sticks to the husk, continue steaming for another 15–20 minutes and test again.
Serving Suggestions
Serve Grandmother’s Tamales with:
- Homemade salsa roja
- Salsa verde
- Mexican rice
- Refried beans
- Pinto beans
- Guacamole
- Sour cream
- Pickled jalapeños
- Fresh cilantro
- Lime wedges
Delicious Filling Variations
Green Chile & Cheese
Roasted green chiles with Monterey Jack cheese.
Chicken in Green Salsa
Shredded chicken mixed with salsa verde.
Beef Tamales
Slow-cooked shredded beef in red chile sauce.
Cheese & Jalapeño
A vegetarian favorite with gooey cheese and sliced jalapeños.
Bean & Cheese
Refried beans with cheddar or Oaxaca cheese.
Sweet Tamales
Masa flavored with cinnamon and vanilla, filled with raisins, pineapple, or sweetened fruit.
Tips for Perfect Tamales
- Soak the corn husks until completely pliable to prevent tearing.
- Beat the lard thoroughly for a lighter, fluffier masa.
- Keep the masa covered with a damp towel while assembling to prevent it from drying out.
- Avoid overfilling the tamales, or they may split during steaming.
- Let the cooked tamales rest for 10–15 minutes before serving to allow the masa to set.
Storage
Refrigerator
Store cooled tamales in an airtight container for up to 5 days.
Freezer
Freeze individually or in batches for up to 3 months. Wrap well to prevent freezer burn.